| |
About group privileges
How group and user privileges are set
FirstClass provides the opportunity to customize user limits and privileges in the way that best fits your organization. You can set privileges once to satisfy all users, or you can set privileges at the group or user level for a more flexible system customized to the needs of each user or group of users. Privileges are an important security feature in FirstClass and, if used effectively with Directory filtering, can help you create a safe and worry-free collaborative environment.
While privileges and how they are set may seem complicated, they actually follow a few simple rules. First, let’s look at a User Information form and see how user groups are listed. Assuming a new system with no users added yet, we’ll look at the administrator’s account.
1 Select Admin > List Directory.
2 Enter Admin in the Pattern field.
3 At Search select By Name.
4 Select Regular Users.
5 Click Search.
6 Select the desired entry (administrator) and click Edit.
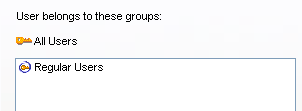
7 Select the User Groups tab.
The administrator, by default, belongs to the Regular Users group. However, everyone who logs into your system is also a member of the All Users group.
Since everyone belongs to All Users, it’s simplest to set system wide privileges there. You can alternatively use the privileges and the Model Desktops of the class of user groups to control what users see. Since all users are either Regular or Remote, you can modify those groups to control features for everyone.
When FirstClass sets features for each user, it looks at the following items in the following order:
• the System Profile
• the All Users group
• the class of user group (Regular users or Remote users)
• the groups you have created and added the user to in the order in which they appear in the User Groups field
• the User Information form.
The key things to remember are:
• every setting in the User Information form overrides what was set before
• user defined groups override those groups that came before them.
Therefore, take care in the order in which you place your user groups. The tristate checkboxes on the user group indicate whether a setting has been changed or left as previously defined. The User Information form has two checkboxes, one is a tristate box used to change the setting, the other is a display only field indicating the current setting. From the User Information form, you can determine exactly what features each user has.
For more information
| ||

