| |
Creating custom column layouts
Understanding custom columns
All containers have the following default columns enabled:
Adding additional standard or customs columns allows users to customize their container layouts. There are other standard columns available in addition to the default ones that are displayed, as well as custom ones that you can create.
Adding columns
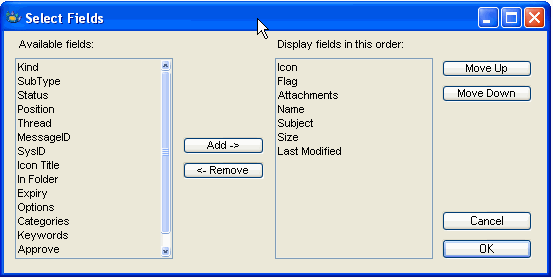
The fastest way to add or remove standard or custom columns is to right-click (Win) or control-click (Mac OS) in a container's window, and choose "Select Fields". Choose which fields to add or remove from the container, and the order in which they will be displayed.
Custom columns cannot be added to calendars or contact databases.
Setting up custom columns
Custom columns can be set for container templates (all member containers inherit the column layout) or for individual containers.
Custom columns are created using "Column documents" in a manner similar to rules. A column document is created in the Rules & Resources folder of a container or container template. Once the custom column rule is created and saved, FirstClass compiles it and adds the newly created columns to the parent container. For more information see the Custom Columns form help.
Column documents, like all FirstClass documents, can also be attached to messages and sent to other users for use in their containers.
The difference between custom columns and the additional standard columns is that custom columns allows you to set specific guidelines for how the columns are displayed. For example, you can customize the name of the column, what goes in it, the alignment, height, width etc. You can even specify the icon and text that will be displayed in Icon view. This is useful for creating applications or databases.
Setting custom columns at the container template level
1 Double-click the container template to open the container.
2 Click the Resources button to open the Rules folder.
3 Click the New Custom Column Rule icon on the toolbar.
4 Fill in the Custom Columns form.
Setting custom columns at the conference level
1 Double-click the conference to open it.
2 Choose Collaborate > Rules to open the Rules folder.
3 Click the New Custom Column Rule icon on the toolbar.
4 Fill in the Custom Columns form.
For more information
| ||

